6 Tips & Tricks for Staining Wood
Whether you've found an exciting piece of furniture to upcycle, or you want to give your wooden furniture a new lease of life, wood staining is the way to go. Wood staining is a task that can be completed with minimal DIY skills. However, it can get messy if you're not careful, so it pays to do your research before starting. In this article, we explore six wood staining tips and tricks to get your wooden items shining brightly.
1. Which wooden items need staining?
Before getting started, it is important to think about whether the item you are considering requires staining. The purpose of wood staining is, ultimately, to improve the look of the wooden surface. This allows you to alter the color of the wood to a different natural shade, or an alternative color entirely. Wood staining is an ideal solution for pieces of wooden furniture that you wish to enhance, but it will not provide protection if exposed outside.
If you are wanting to improve the strength and durability of items that will be outdoors, you will be better off using a wood sealer.
2. Choosing the right stain
Once you've decided that staining is the correct course of action, you need to think about the type of wood stain needed for your project. There are many different categories of stain to choose from (not to mention color!), however, the main consideration is whether you go for an oil stain or water-based stain. Oil stains are made up of a linseed oil base and take a long time to dry. This is helpful if you are painting a large area and are hoping for a smooth and consistent finish, such as staining wooden floors. Water-based stains are generally easier to apply, dry in about 24 hours, release less of an odor, and have less toxicity.
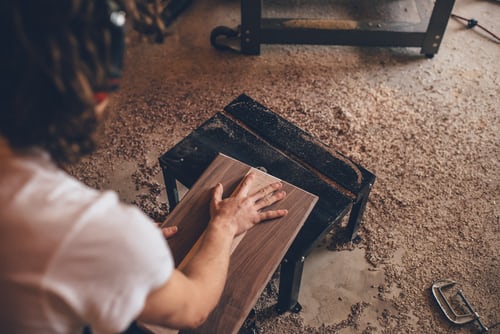
3. Prepare your surface
With most DIY jobs, preparation is key to ensure a quality finish. Jumping right in with a project increases the risk of uneven surfaces being highlighted. Since dust can create a messy finish, it is important to s and first. Give the item a thorough once over with your sandpaper in the direction of the grain and smooth out any snags. Once you are satisfied, brush down the item to check that all dust is removed and go over with a tack cloth to eliminate any lingering dust particles.
4. Apply a pre-stain conditioner
While not essential, applying a pre-stain conditioner beforehand can enhance the overall appearance of your project. The pre-stain conditioner treatment can be used on any wood, but especially improves softwoods. Treating the wood prior to applying the wood stain enhances the absorption of the stain and reduces the likelihood of blotches appearing on the surface. Although this adds another step to the process, the extra effort will definitely be worth it in the end.
5. How to apply wood stain
Once your surface is prepped, you're ready for the main event. There are a variety of tools you can use to wood stain, but we recommend a staining pad to do the job. This provides a smooth application without blemishes or drips. Make sure to give the wood stain a good stir before use and then apply evenly using your tool of choice.
6. A smooth finish
For the ultimate wood stain treatment, finish off with a layer of top-coat. We suggest for your top-coat to be made of the same material as your wood stain (if using an oil stain go for an oil-based varnish for your top-coat). However, this isn't always essential, so check the small print before purchasing. There are a variety of brushes you can use to apply the top-coat, but it is best to base it on the varnish.
You will need a brush made of natural bristles if using an oil-based varnish, and a synthetic brush for a water-based varnish.
Applying wood stain is a simple, yet effective way of revamping wooden items inside your house. It can either help the wood to reclaim its original color, or allow you to be experimental with a totally different style. Whatever you decide, make sure you follow our top tips and tricks for using wood stain!
What to Read Next